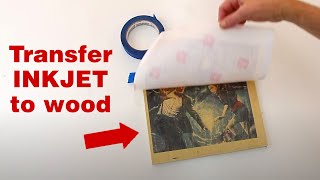
How To Transfer A Printed Photo To A Piece Of Raw Pine Wood
Transforming a printed photo into a piece of art on raw pine wood is a creative and rewarding process. This technique involves transferring the image from paper to wood using a transfer paper, which acts as a temporary medium. Here's a step-by-step guide to help you achieve a beautiful and lasting result.
Materials Needed
- A printed photo
- Raw pine wood
- Transfer paper
- Pencil
- Ruler
- X-Acto knife
- Sandpaper (various grits)
- Wood glue
- Clamps
- Paintbrush
- Wood stain or paint
- Sealer
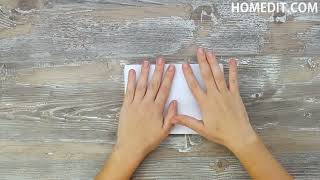
Step 1: Prepare the Wood
Begin by sanding the raw pine wood to create a smooth surface. Start with a coarse grit sandpaper (around 60-80 grit) and gradually move to finer grits (120-220 grit) to achieve a polished finish. Wipe away any dust with a damp cloth.
Step 2: Trace the Photo
Place the printed photo on a flat surface and trace its outline onto the transfer paper using a pencil and ruler. Make sure to trace the entire image, including any borders or frames. Once you have the outline, carefully cut out the shape using an X-Acto knife.
Step 3: Apply Transfer Paper
Lay the transfer paper with the traced image facing down onto the printed photo. Press firmly and hold in place for a few seconds to ensure the image is transferred. Remove the transfer paper, and you should now have a negative image of the photo on the transfer paper.
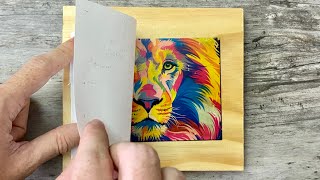
Step 4: Transfer the Image to Wood
Place the transfer paper with the negative image facing up onto the sanded wood. Press firmly and hold in place for a few seconds to transfer the image. Remove the transfer paper, and you should now see the positive image of the photo on the wood.
Step 5: Prepare for Staining or Painting
Once the image is transferred, you can choose to stain or paint the wood. If you're staining, apply a thin, even coat of wood stain to the wood using a paintbrush. If you're painting, you can use acrylic or oil-based paints to create a more detailed and vibrant image.
Step 6: Seal the Wood
After the stain or paint has dried completely, apply a clear sealant to protect the wood and the transferred image. Allow the sealer to dry according to the manufacturer's instructions.
Tips for Success
- Work in a well-ventilated area when using wood stains or paints.
- Use a fine-grit sandpaper to achieve a smooth surface for better adhesion of the transfer paper.
- Be patient when transferring the image, as pressing too hard or too quickly can result in a poor transfer.
- Experiment with different stains and paints to achieve the desired look for your piece.
Transferring a printed photo to a piece of raw pine wood is a creative and enjoyable process that allows you to transform an ordinary image into a unique and beautiful piece of art. By following these steps and using the right materials, you can create a lasting and impressive result.