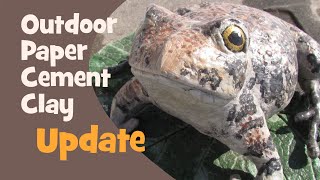
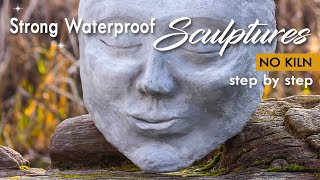
How To Waterproof A Papier-mâché Sculpture For Outdoor Use
Papier-mâché sculptures are a popular craft project, but they can be delicate and prone to damage when exposed to outdoor elements. Waterproofing your sculpture is essential to ensure its longevity and protect it from the elements. Here's a step-by-step guide to help you waterproof your papier-mâché sculpture for outdoor use.
Materials Needed
- Papier-mâché sculpture
- Acrylic sealer or varnish
- Waterproof glue or adhesive
- Sandpaper (medium and fine grit)
- Rags or paper towels
- Paintbrushes or foam brushes
- Drop cloth or newspaper
- Painter's tape
Step 1: Prepare Your Workspace
Before you begin, make sure you have a well-ventilated workspace. Papier-mâché can release small amounts of dust and fumes, so it's essential to work in an area with good airflow. Lay down a drop cloth or newspaper to protect your workspace from any spills or drips.
Step 2: Sand Your Sculpture
Sanding your papier-mâché sculpture is crucial to ensure that the sealer or varnish adheres properly. Use medium-grit sandpaper to gently sand the surface of your sculpture, working in small sections. Be careful not to sand too aggressively, as this can damage the papier-mâché. Once you've sanded the entire surface, wipe away any dust or debris with a rag or paper towel.
Next, use fine-grit sandpaper to lightly sand the surface again. This will help to create a smooth, even surface for the sealer or varnish to adhere to. Wipe away any dust or debris once more.
Step 3: Apply Waterproof Glue or Adhesive
If your papier-mâché sculpture has any seams or joints, it's essential to apply a waterproof glue or adhesive to these areas. This will help to seal the sculpture and prevent water from seeping in. Use a small brush or foam brush to apply the glue or adhesive to the seams, working in small sections. Allow the glue or adhesive to dry completely before moving on to the next step.
Step 4: Apply Acrylic Sealer or Varnish
Once your sculpture is dry and sanded, it's time to apply the acrylic sealer or varnish. Use a paintbrush or foam brush to apply a thin, even coat of sealer or varnish to the surface of your sculpture. Be careful not to apply too much, as this can cause the sealer or varnish to drip or run.
Allow the first coat of sealer or varnish to dry completely, according to the manufacturer's instructions. Once it's dry, apply a second coat, following the same steps as before. This will help to ensure that your sculpture is fully waterproofed and protected from the elements.
Step 5: Apply a Second Coat of Sealer or Varnish (Optional)
If you want to add an extra layer of protection to your sculpture, you can apply a third coat of sealer or varnish. This is especially useful if your sculpture will be exposed to heavy rain or other harsh weather conditions. Allow the second coat of sealer or varnish to dry completely before applying the third coat.
Step 6: Allow Your Sculpture to Cure
Once you've applied the final coat of sealer or varnish, allow your sculpture to cure completely. This can take anywhere from a few hours to a few days, depending on the type of sealer or varnish you've used. Be sure to follow the manufacturer's instructions for curing times.
Step 7: Display Your Waterproofed Sculpture
Once your sculpture is fully cured, you can display it outdoors. Be sure to choose a location that is protected from direct sunlight and heavy rain, if possible. This will help to ensure that your sculpture remains in good condition for years to come.
Conclusion
Waterproofing your papier-mâché sculpture is essential to ensure its longevity and protect it from the elements. By following these steps, you can create a durable, weather-resistant sculpture that will last for years to come. With a little patience and care, you can enjoy your outdoor papier-mâché sculpture for many years to come.